Today I’d like to tell you about a small but instructive repair. Our Zehnder ComfoAir Q350 ventilation unit was manufactured on 05/07/2019, which makes it around seven years old now, about six of which it has been running in our home. Until recently it worked reliably. But in June 2026 it suddenly displayed the message “Maintenance mode” or something similar on the screen. With the very first press on the device display, the unit then started restarting itself over and over again, once per second. In this post I’ll walk you through how I narrowed down this bootloop step by step and finally repaired it myself.
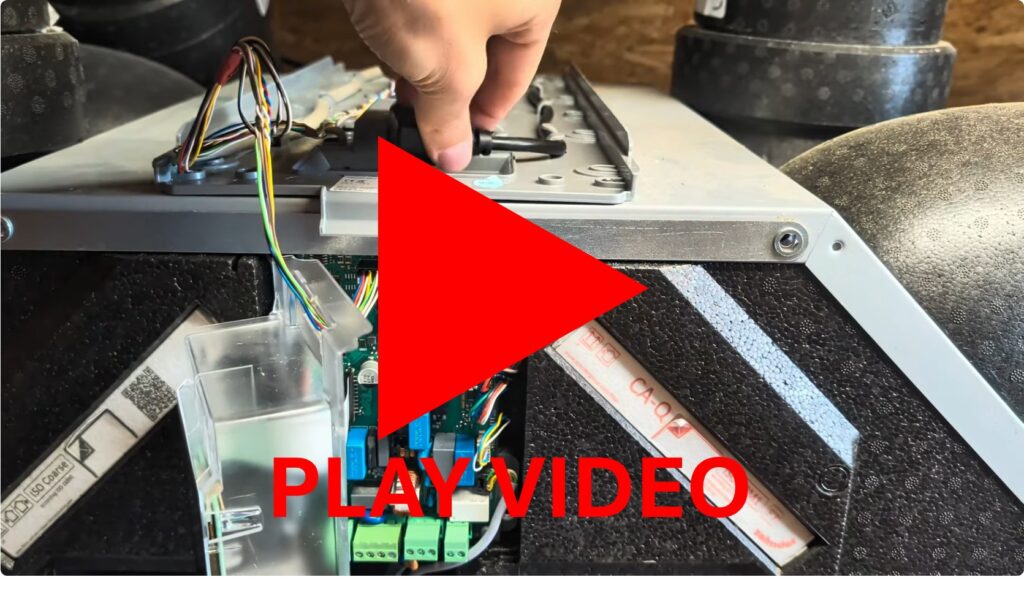
The video below shows the problem of the bootloop.
What was the problem? The unit keeps restarting
It all started with a message on the device. I wanted to use the menu on the unit itself to find out what was going on, but from the very first press on the membrane button, the device kept restarting once per second. A classic bootloop, in other words: the unit powers up, crashes after a short time and starts all over again. Working in the menu in any sensible way was impossible, especially since it wasn’t even being displayed anymore.
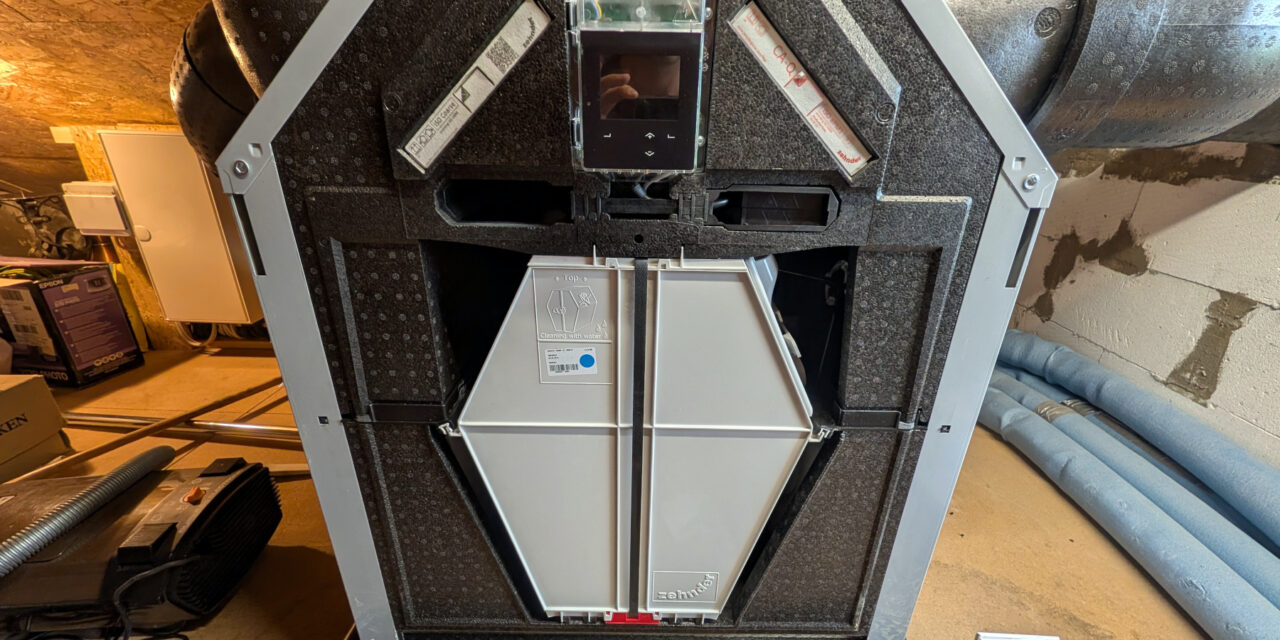
Here’s how we do things at our place: when something breaks and tradespeople are hard to reach, I like to take things apart myself first. So I got out the installation manual to understand where the sensors are located, how to remove the heating coil and how to check the four sensors in the first place – for example, whether dirt was causing the problem or whether one of the fan motors was seized.
Taking the unit apart – a big box of building blocks
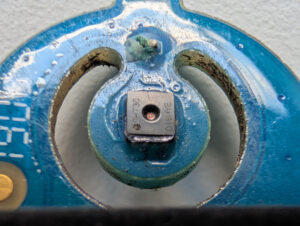
I removed the sensors on the left and right. Something caught my eye straight away: the supply-air sensor was extremely dusty and had obviously never been cleaned – and that despite the fact that we had specifically had the unit’s installer come out for maintenance. What he did back then I can’t say, since I wasn’t there. But it can’t have been much.
That’s how bad the sensor looked – and yes, that’s not good.
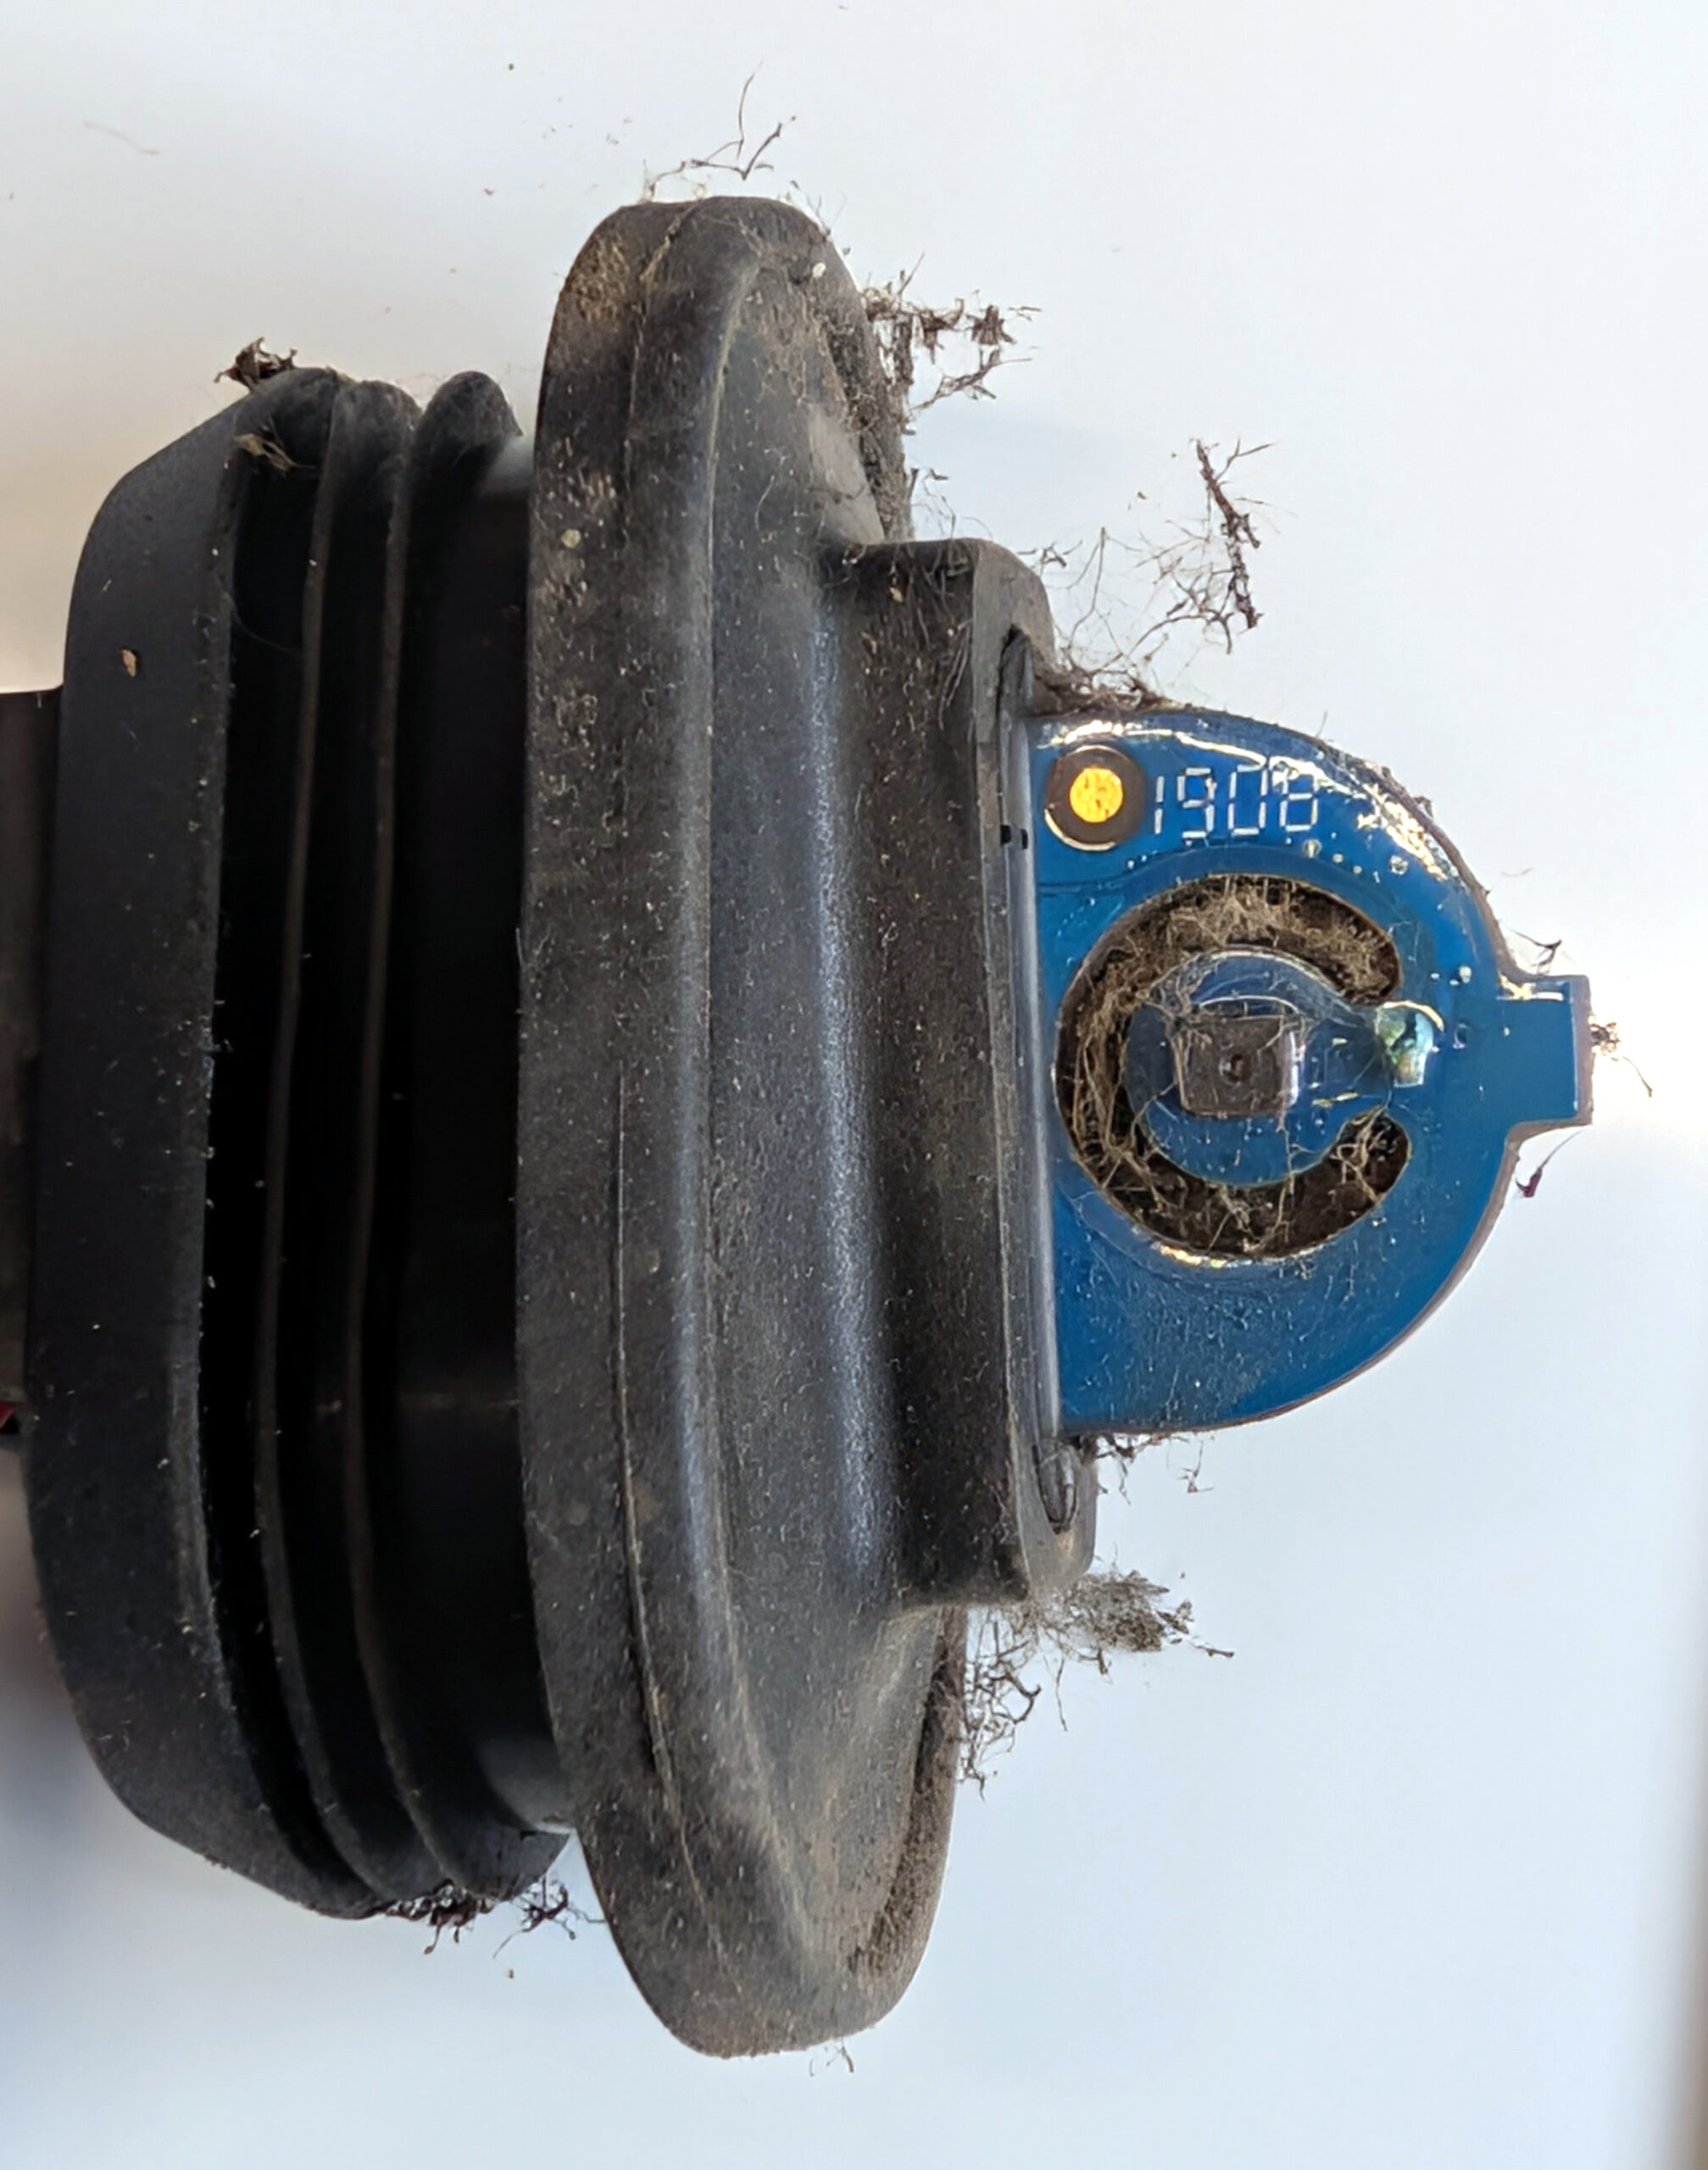
Zehnder ComfoAir Q350 SHT30 I2C Sensor dirty
The identical exhaust-air sensor, by contrast, still looked perfectly clean, so there was nothing to clean here. So after I had taken everything apart, cleaned it thoroughly and reassembled it, the fault was still not gone: the unit kept restarting every second.
A night without power – the brief glimmer of hope
I then took a break and left the device unpowered overnight. The next day the unit actually ran for around 30 seconds before falling back into the bootloop. That made it clear: the problem wasn’t going to fix itself.
Measuring the board – with professional help
At this point I brought in an acquaintance who used to be a TV technician in his working days. Together we measured the board. The result was initially sobering: we couldn’t find any fault with the 3.3 V supply voltage at the microcontroller. The lines didn’t look unusually noisy on the oscilloscope either. By and large, we couldn’t find any obvious fault on the board.
Narrowing it down by disconnecting – how I found the culprit
So we circled in on it systematically: we disconnected all the sensors, motors and also the heating element’s cable and switched the device on. And lo and behold, the unit booted cleanly and stayed stable in commissioning mode. That proved it: the board itself wasn’t the cause. Okay, we should have done this before measuring the board. But then again, I had assumed that Zehnder had built decent error handling into their software – an IF/ELSE check, for example. More on that later in the text.
We had unplugged all the cables in the yellow connectors and then reconnected them one after another to narrow down the fault.
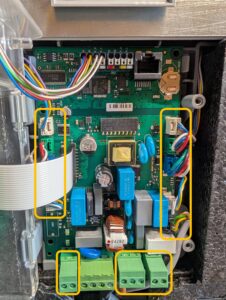
Zehnder ComfoAir Q350 Sensor motor heating check
We then reconnected the cables and sensors one after another. And it was precisely with the supply-air sensor that the pattern of the per-second crashes reappeared. That was, of all things, the sensor that had collected the most dust – the one that sits directly in the supply-air duct, exposed to air that is sometimes hot and dry, sometimes humid or cold.
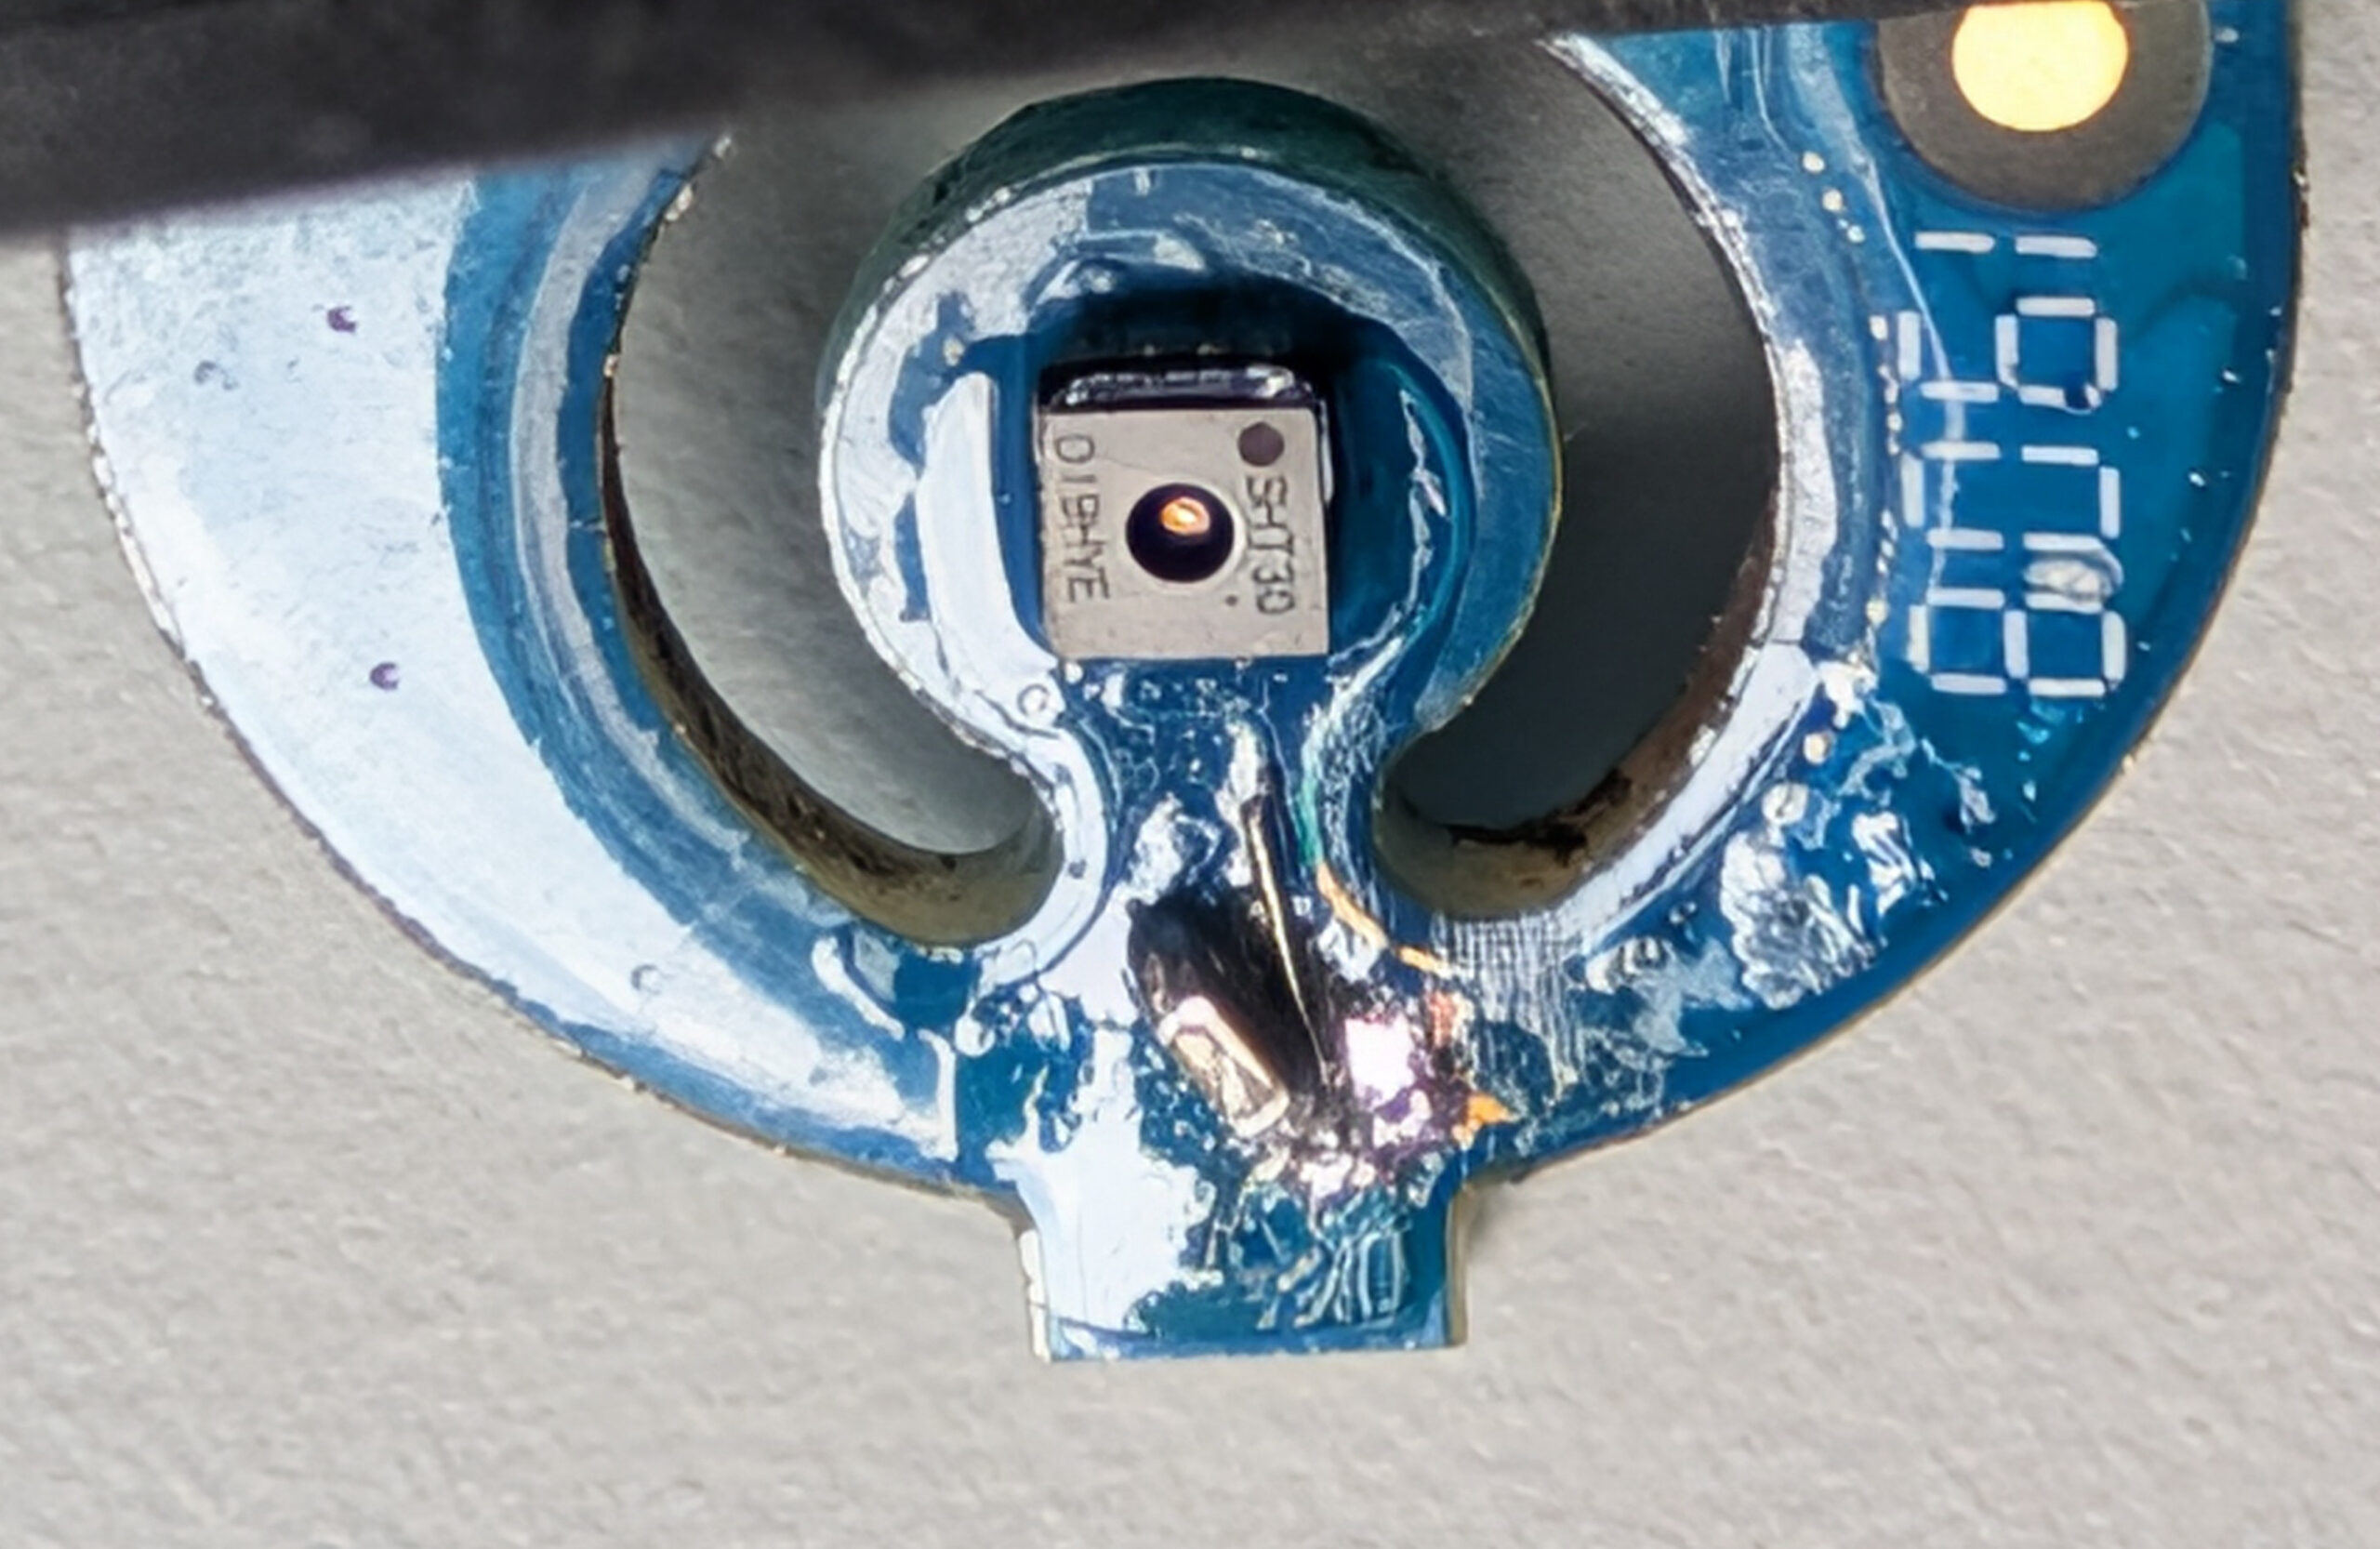
We then took a very close look at this sensor and quickly recognised it: it’s a classic I²C sensor of the SHT30 type. That made me happy, because a sensor like this costs only a few euros including shipping on AliExpress.
The faulty capacitor at the SHT30 sensor
On closer inspection we noticed that the small capacitor between V and GND right in front of the sensor looked odd: the potting compound was bulging upwards and had a greenish shimmer – almost like verdigris, or corrosion.
Zehnder ComfoAir Q350 SHT30 I2C Sensor
This corroded decoupling capacitor probably made the sensor’s supply unstable or caused a short circuit, thereby disrupting the I²C communication. The firmware apparently detected this as a fault or something similar that wasn’t handled cleanly – and went into the bootloop. For such an expensive device I personally find that a bit weak, but mistakes happen, and these days, with AI support, perhaps less often than back in 2019.
Giving in to my inner explorer, we scratched off the lacquer and the corrosion with a fingernail, right there in the attic in front of the unit. A small lesson learned: in the process we promptly lost the tiny capacitor and also slightly damaged a trace. For a TV technician with the right equipment, fortunately, that’s no problem.
The repair: a new 100 nF capacitor
Two days later I had the sensor back with a freshly soldered capacitor. When choosing the replacement part, we assumed that an SHT30 I²C design usually has a 100 nF decoupling capacitor right at the sensor’s VDD supply. Because we had slightly damaged the trace while scratching, we additionally had to solder a small, slightly extended replacement trace to the capacitor.
In the picture you can see quite well how the new capacitor is installed, and that it was lacquered again to give it some protection against the supply air that flows right past it. It doesn’t look pretty, but the components are so small that soldering them really isn’t easy – and the main thing is that it worked at all.
Zehnder ComfoAir Q350 SHT30 I2C Sensor new capacitor
The moment of truth – is it running again?
Naturally, we were both very curious about what would happen when we reinstalled the sensor. In short: the unit booted up stably into commissioning mode, and I was able to re-enter all the settings. I even dug out the airflow measurement report so I could restore the old values. Since then our ComfoAir Q350 has been running flawlessly again – with the repaired “old” sensor.
My personal conclusion
I learned a lot from this repair. For example, that a Zehnder ComfoAir Q350 is basically built like a big box of building blocks that you can take apart without much trouble. Zehnder really designed that well, and I’d buy a unit like this again. I also really like the fact that many of the sensors are based on standard components that you can replace yourself as a skilled tinkerer.
I found it interesting that the supply-air sensor is nicely packaged in a moulded rubber holder, yet is exposed directly to the supply air without much protection against moisture. Slightly better insulation against humidity might have prevented the capacitor failure. The fact that the SHT30 has to sit directly in the supply air can’t be changed – that’s presumably just how it has to be.
The software also gives me a bit of pause: instead of showing an understandable note like “Fault on the I²C sensor” on the display, the unit simply falls into a bootloop. Whether that’s intentional I can’t prove – but as a computer scientist it does surprise me that a simple piece of logic along the lines of “IF the sensor returns implausible values, THEN show a clear error message on the display” is apparently missing here. Such a message would have spared me the whole hunt. I strongly assume that Zehnder, perhaps with AI support, will stop leaving out such IF/ELSE checks in the future. But either way – mistakes are part of it, and you just have to learn from them.
Bottom line, I’m very happy: I got to learn something new again and probably saved 300 € in the process. The original sensor alone costs about 80 €, plus the installer would have come on top of that. And the best part: I can now service and clean the unit myself, and I’ll keep an eye on the supply-air sensor regularly from now on.


Recent Comments